The bathroom is one of the most used rooms in our homes, but unfortunately, it is also one of the dirtiest.
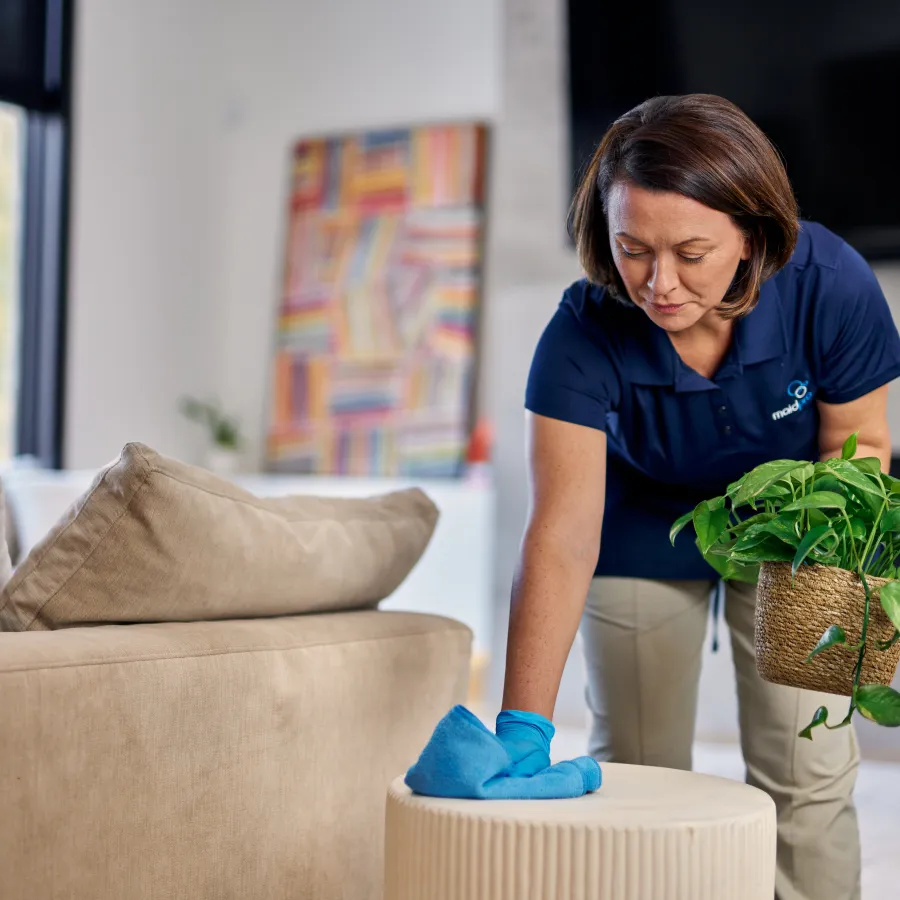
That's why the PROs at MaidPro make it a priority to thorough clean their clients' bathrooms. Not only will it make the bathroom more pleasant to use, but it will also make it healthier by removing harmful bacteria, mold, and viruses. All too often, people only clean the dirt that they can immediately see, although this is not enough when it comes to the bathroom. For proper bathroom cleaning, each surface and area need addressing.
9 steps to give your bathroom a complete cleaning -
Step 1. Pre-Spray the Dirty Areas
Make your bathroom cleaning project easier by pre-spraying dirty areas with a bathroom disinfecting all-purpose cleaner. This includes the sink, tile, toilet, and tub. Allow the cleaner to sit and soak. This will make scrubbing your bathroom clean easier later.
Step 2. Dust
When it is time to start cleaning, work your way from top to bottom. This allows all dust, dirt, and grime to flow downward where you have not cleaned yet. Otherwise, you would have to do repeat cleaning as the already cleaned area got dirty again when working from the floor up. So, start at the ceiling with a pole duster. Wipe along the top of the wall, in corners, around light fixtures, and vents. Remove dust and cobwebs on anything up high that is out of reach for wiping.
Step 3. Wipe Down Surfaces
At this point, your bathroom surfaces are probably covered in cleaner and dust. Use a microfiber cloth and all-purpose cleaner to wipe down all of the surfaces within reach. This includes shelving, windowsills, decor, mirror frames, towel racks, and anything else in your bathroom that needs cleaning. Microfiber cloths are ideal because they pick up and trap dust, dirt, and grime better than paper towels. You can also wash and reuse them. Microfiber is also better at removing bacteria, which helps disinfect your bathroom. A general-purpose cleaner should be safe for all of the surfaces in your bathroom but check the label before use to be sure.
Step 4. Disinfect the Vanity
Wipe down the bathroom counter and surrounding vanity with an all-purpose cleaner and a microfiber cloth. Be sure to get in the corners and crevices. Use this time to organize the toiletries and other items on your bathroom counter. Use baskets for larger items or acrylic organizers for smaller items. Organizing your vanity counter can help to keep your bathroom cleaner by preventing spills and reducing clutter.
Step 5. Clean the Mirror
Say goodbye to the old way of doing things. Paper towels and newspapers are not your best option. Instead, use a microfiber cloth. It is lint-free and reusable. Use Windex, a vinegar and water solution, or another glass cleaner. Each of these will clean the mirror and also leave a streak-free finish. When cleaning the mirror, pay attention to how you move your hand. Circular motions are not ideal because they redeposit dirt from the cloth back onto the mirror's surface, making your cleaning job harder. Instead, wipe from one side of the mirror to the other in an "S" pattern. In addition, always apply the cleaner to your cloth, not the mirror. Spraying the mirror creates the risk of the liquid seeping behind the silver coating, which creates black tarnish marks you will never be able to remove.
Step 6. Clean the Sink
Once the vanity area surrounding the sink is clean, it is time to move to the sink itself. Use an all-purpose cleaner and disinfectant to remove soap scum and dried toothpaste from the sink bowl. A microfiber cloth works well to wipe down surfaces. For stubborn grime, use a scrub brush or an old toothbrush. Pay special attention to the base of the faucet fixture and the drain, where dirt and mold tend to build up. Finish by rinsing the sink clean. If your faucet has a chrome finish, use a vinegar and water mixture with a microfiber to remove water spots.
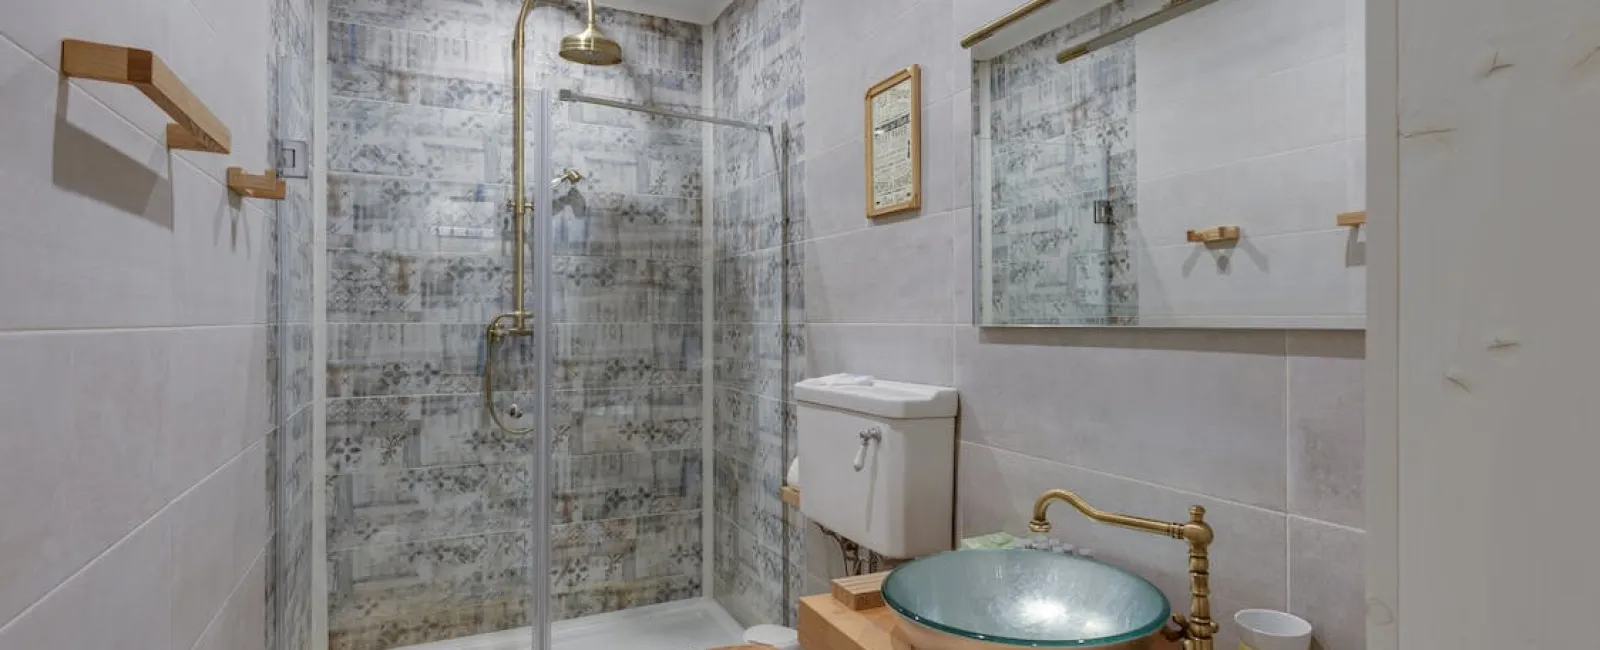
Step 7. Scrub the Shower
Move to the shower after you clean the vanity area. Spray the shower walls with an all-purpose or tile cleaner, then wipe down. Wipe the shower's water handle and other hardware to remove any stains or soap scum. Next, scrub the tile and grout that is dirty. Typically, this includes the shower floor and lower wall tile. Do not forget to clean the shower door track if you have one. Plug the drain hole and fill the track with vinegar. Allow it to sit for several hours. Then use a toothbrush to scrub it clean. Finally, rinse the track and the rest of the shower wall.
Clean the Grout
In some cases, general shower cleaning is not enough. Dirty grout can bring down the entire look of a shower. Apply a grout cleaner and let it soak. Use a scrub brush or toothbrush to scrub the stubborn stains. Rinse and repeat if necessary.
Fiberglass Showers
If your shower has a fiberglass liner, spray distilled white vinegar and a squeegee to clean the walls. Because fiberglass shower floors typically have a texture to make them safer, use a soft-bristled brush to clean them. Once the walls are spotless, use a fiberglass boat wax on them. This protects the fiberglass and helps water roll right off, preventing water spots. Do not put it on the floor, though. This will make it slippery and dangerous while showering.
Stone Showers
If your shower has granite, marble, or another natural stone, then you will need to be careful about how you go about cleaning it, or you could permanently damage it. Use a commercial stone cleaner or a dish soap solution and warm water. Next, wipe the stone with a microfiber cloth, starting at the top of the shower and working your way down. About twice a year, you will need to apply a stone sealer. This protects the stone and prevents bacteria from taking up permanent residence.
Clean the Shower Head
Over time, minerals build up on your showerhead. This reduces the amount of water flow. In addition, soap scum and mildew can build up. These can make your water smell funny and result in you showering in dirty water. While it would be nice if the showerhead were self-cleaning, we are not so lucky. To clean, place a half cup of baking soda in a gallon Ziplock bag. Slowly add four cups of vinegar and one cup of water. Be careful; you don't want the mixture to overflow. The next step can be a bit tricky. You need to place the bag over your showerhead, so the entire head is submerged. This can be tricky, so try angling the showerhead down. You may need to pour out some of the mixture if it is too much or too heavy for your showerhead. Secure the bag with a rubber band or zip tie. Allow the showerhead to soak for several hours or even overnight if possible. Wipe down the showerhead with a microfiber cloth after removing the bag.
Cleaning Glass Shower Doors
Glass shower doors look elegant and beautiful when they are clean. Unfortunately, dirty shower doors can bring down the look of your bathroom. This is because water spots and soap scum build up on the glass. For a natural clean, use half a lemon and baking soda to scrub the stained areas of the glass. Another option is to use vinegar diluted with water. Spray the glass and let it sit for ten minutes. Then dip a microfiber cloth in baking soda and scrub the glass. For a more vigorous clean, you can use a scum remover. Spray on the door, allow to soak, and then wipe clean. To avoid endlessly chasing down streaks, wipe one side in an up-and-down "S" motion. Then wipe the other side in a left-to-right "S" motion. That way, if there is a streak or a missed spot, you can easily locate it.
Step 8. Clean the Toilet
The toilet is a hotspot of grime and bacteria, making it one of the most important places to clean. Work from least to most soiled when tackling this part of your bathroom cleaning. To do this, start by wiping down the water tank and moving down the outside of the bowl to the base. Avoid the seat and lid at this time. You can use a general-purpose cleaner and disinfectant and a microfiber cloth. Do not forget to wipe around the hardware attaching the toilet to the floor and the area behind the toilet where mops can't reach.
When the outside of the toilet is clean, you can move to the seat, lid, and bowl. Wipe down the seat and lid with your cleaner. You can also wipe the edge of the bowl underneath the seat. To clean the inside of the bowl, use a toilet brush and toilet bowl cleaner. Do not forget to clean under the bowl lip and down into the waste exit area.
Remove Stains
If your toilet bowl has staining, you will need to take an extra step after cleaning to remove the stains. These unsightly marks in your toilet bowl can be from hard water minerals, rust, copper, or even mold. First, flush the toilet and turn off the water supply to leave the toilet bowl empty. You can then use baking soda to make a paste that you cover the stains with. Let it sit for ten minutes, pour two cups of vinegar in, and let it sit for 30 minutes. Finish by scrubbing the toilet clean, turning the water back on, and flushing to rinse. Another option is to use hydrogen peroxide to remove the stains
Step 9. Vacuum and Mop
When working from the ceiling down, the last step in your bathroom cleaning should be the floor. Start by vacuuming to remove any dust and dirt. Then you can mop the floor with your preferred floor cleaner. This could be a homemade mixture of one tablespoon of dish soap, one gallon of water, and one-quarter cup of vinegar. Work in sections, using a towel to dry the floor as you go. This helps to prevent water spots or streaks. Start with the floor, that is the furthest point into the bathroom. Then work your way towards the door. That way, you don't have to walk over your freshly cleaned floors to exit the bathroom.
Clean the Grout Lines
A common flooring material in bathrooms is tile. While the tile is easy to wash, the grout lines present the greatest struggle. Start by choosing a grout cleaner you are comfortable with and compatible with your tile and grout. Some cleaners are acid and harsh chemical free. They work, but may require more elbow grease when scrubbing. Other cleaners contain harsh chemicals, but you may find them more effective with less effort on your part. Always test a small area before applying it to all of your grout. Some cleaners are not designed for use on colored grout. Others are not compatible with natural stone tiles. Always follow the manufacturer's directions when using a cleaner. Typically, they will require you to apply, let sit for a period of time, scrub with a brush, and then rinse clean. You could use a specific grout brush when scrubbing, but a toothbrush will also work.
Hire the Experts to do the Deep Cleaning
Doing a thorough and deep cleaning of your bathroom is not a fast job. The longer you neglect it, the more intensive the cleaning required. Hiring experts like MaidPro can help you get your bathroom back on track. With regular MaidPro services, you can skip the intensive cleaning and simply do a quick wipe-down in between cleaning services. In addition, the professional and experienced MaidPro cleaners will assess your bathroom to address its unique needs.
Request a quote for your MaidPro cleaning services today.
See Parts 2 & 3 in our Complete Cleaning series: